Wormery
What is a Wormery?
| How can we learn about what happens in the soil? Soil-Net explains about the astonishing variety of life in the soil. From the smallest microorganisms to the largest mammals - many creatures live within the soil. Perhaps one of the best-known soil creatures is the common earthworm (Lumbricus terrestris). |  Activity_Wormery.pdf Activity_Wormery.pdf |
How to set up the wormery
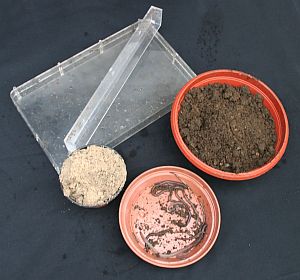
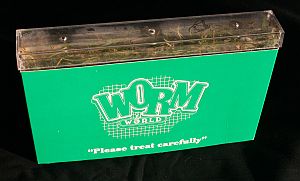
To start a wormery, you will need very little equipment. Here are the materials - the wormery case, some soil, some fine sand and of course some worms!
Catching and caring for worms
You will need to catch some worms - for a wormery of this size, about 10 worms should do. These worms were collected from garden soils with a small digging trowel. As earth is carefully removed and a hole dug, the worms are revealed. Clearly worms are keen not to be caught and quickly start to move away into the soil. Never pull the worms backwards out of their burrows - instead gently dig them out. Worms have hundreds of tiny bristles called cilia oriented back down their bodies. These bristles are to give them a good grip as they push through the soil - a bit like the studs on football boots. Pulling them out of a burrow will damage these bristles. Worms do not like bright light either, so keep them covered over until they are ready to go into the wormery. After your experiment is over, in 3-4 days, you can gently release the worms back to where you found them. It is perfectly harmless to touch worms - but remember to wash your hands afterwards. You may notice a mucous (slime!) on the worms - this is a lubricant the worms produce to help them slide through the soil - just like oiling the chain on a bicycle makes it move more smoothly.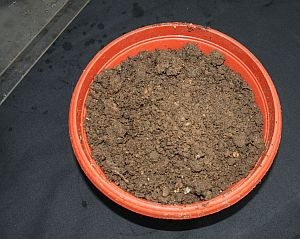
Whilst digging out the worms, keep also a pot of soil ready to fill the wormery. This soil contains the food that the worms will eat whilst they are in the wormery. Worms eat microorganisms - did you know that a teaspoon of healthy soil contains more microrganisms than there are people on the whole planet! That really is amazing - they are too small to see without microscopes though.
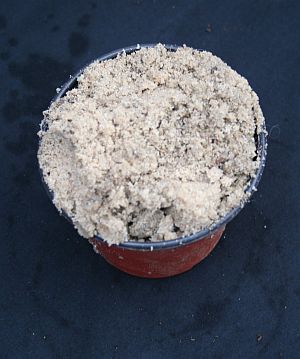
You will also need some fine sand - such as is used in a playground sandpit. The sand will be used to lay down 'layers' in the wormery soil. That way, when the worms move through the soil, their activities will be easy to observe.
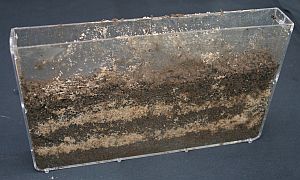
Very carefully, perhaps using an old spoon to help, fill the wormery up with a layer of soil (say 2-3cm), then a covering thin layer of sand (say 1cm), repeating this pattern up to the top. Finish with the soil layer.
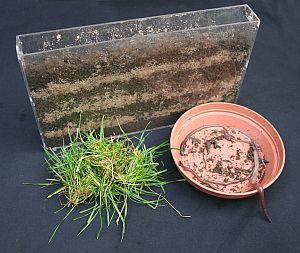
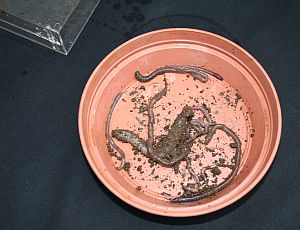
Now you are ready to introduce the worms to their new temporary home. These worms are already moving around - escaping from their pot! Have some grass cuttings ready too.
Next, gently introduce the worms to the soil. They should fairly soon burrow down into the mixture. For further interest, add a thin layer of grass cuttings to the very top of the wormery. You will be able to see how the worms pull the grass down into the soil over time. Aha! So that's where the grass cuttings go to after the lawn is mown!
You want to see what the worms do - but the worms don't like bright light. The solution is that whilst you are not observing the worms, place a cover over the wormery. You can slide this off to observe what has happened before covering the case over again.
 The experiment should be run for about 3-4 days. Don't let the soil dry out - but neither should you soak the soil. A short drizzle of water on the second day should do it. When you pick up the case, never shake it and be careful.
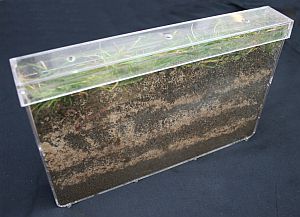
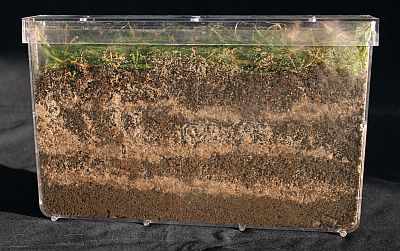
When the experiment has finished you should see a result like this. You can see the bands of sand have been disturbed as the worms have moved through the soil. You should also see some of the grass has been tugged down underground.
Now just imagine a garden lawn, or a football pitch, or a country meadow. What your ten worms have done is being repeated by thousands and thousands of worms working endlessly though the soil just under your feet! Worms eat microorganisms in the soil and are rather like whales eating plankton in the sea. Everything goes in - soil and microorganisms! The worms digest the microorganisms and pass the soil out behind them.....oh OK they poo out the soil. This is often pushed up to the soil surface as worm 'casts', helping to make a rich soil. Did you know the great Charles Darwin first made his name as a scientific expert of the life of worms before he wrote 'on the Origin of the Species'?
When the experiment is over, don't forget to release the soil and worms gently back to where you caught them and to then cover them over with soil.
Further information about worms
For more information about worms, visit the excellent UK Safari websiteFor a bit of fun, visit the world wormcharming website!
